SQ-3P - Eurorack MIDI step sequencer
SQ-3P is a software to run on the VMC-system. It provides a MIDI step sequencer inspired by the sequencers in the Roland JX-3P and SH-101. The software is published as open source under the creative commons license "by-nc-sa 4.0"
- Download the latest stable Version of the Arduino code.
SQ-3P - Users Manual
Firmware Version 2.05
VMC-1 Hardware Version 1.5.4
"SQ-3P" is a programm for an Arduino Nano mounted on a "fanwander VMC-1". The SQ-3P is a MIDI step sequencer which can be triggered by external positive voltage trigger signals, by an internal clock, or by MIDI-Clock. The basic idea comes from the sequencer, which was implemented in the Roland® Synthesizer JX-3P.Usually you will buy a fanwander VMC-1 with the software installed already. If your VMC-1 runs a different software at the moment, then please consult the programming instructions for the VMC-1 on how to install software.
Quickstart...
...for those, who think they don't need manuals:- The function of the five buttons
PLAY
STOP
WRITE
F1
F2
Stop Mode
Play
Write
Enter Setup
MIDI-Reset
(Transpose)
Play Mode
Mute/
Continue on 1
Stop
Gate-Mode
Enter Setup
MIDI-Reset
Transpose
Write Mode
End & Play
End & Stop
Back
Tie
Rest
Setup Mode Select Param
Exit Setup
Edit
< Parameter >
Set Param
Set
-- Value ++
All Modes System Reset
- Good Luck :-)
Connect and Configure the Hardware
This is described in the users manual of the VMC-1.MIDI connections
Basically you need a device which sends MIDI-notes (I will call this "the keyboard") and a device which can create sounds from MIDI-notes (I will call this "the synth"). I will not explain how to connect MIDI devices. So establish the following MIDI connectionsKeyboard-MIDI-Out <-> SQ-3P-MIDI-In,
and
SQ-3P-MIDI-Out <-> Synth-MIDI-In.
Usually you will get a VMC-1 with the SQ-3P software loaded, and set to factory settings. To test with the factory settings of the SQ-3P, set keyboard and synth to MIDI channel “1”.
For other settings please consult the description of the “setup menu”.
Press PLAY. The sequencer should play on the synth a C-major scale and you should be able to play the synth on the keyboard along with the sequence (at least as long as your synth is polyphonic).
If the sequencer plays other notes than the major scale then please do a "Factory Reset" as described in the section "setup menu".
You may also check the instruction for "Adjust Poti-CVs" in the section "setup menu".
IMPORTANT REMARK ON MIDI DATA SOURCES: The Arduino processor used in this module provides only a small buffer, that stores incoming MIDI data. If this buffer is overloaded, then the system may hang or will no longer react on incoming MIDI events at least. In this case you may do a full restart (press all five buttons together).
We do not recommend to feed the SQ-3P with a MIDI signal coming from a DAW or workstation, which contains a lot of note and controller data on all midi channels. The most reliable configuration is a standalone keyboard. If you want to sync the SQ-3P by MIDI-clock from a DAW, then use a separate physical port on your MIDI interface, which provides MIDI-clock only and the notes for playing the SQ-3P.
Write Mode
Writing a sequence in the SQ-3P - Basics
We assume you can play the default sequence successfully and your keyboard plays notes on the synth.- If the sequencer is running hit the STOP button (you cannot change to WRITE from the PLAY mode).
- Hit the WRITE button.
=> the display says “WRITE” (who would guess...) - Play a few single notes on your keyboard. Be sure not to overlap notes.
=> you should see on the display the counter in the upper line count up with each note. Also you should see a “+”-character for each step in the lower line. - Hit STOP and then PLAY.
=> the SQ-3P will play the notes that you've entered before.
The sequencer can store up to 64 steps and 6 notes per step. A step is finally written, when all keys of your keyboard are released (or more technically spoken: when noteOffs have been received for all noteOns of this step). This means, there are several methods to enter a chord.
- Play the chord on the keyboard as a piano player would do
- Press and hold(!) the key for one note of the chord with one finger; then press with another finger (of the other hand) the other notes of the chord one after the other. Then release the held note. The following example will enter a Cmaj7 chord:
Right Hand: ....E...G..H.....
Left Hand: ..C----------....
This way you may enter chords which spread over the full keyboard range, which a pianist never could play with two hands. - Play the chord broken, but legato. Again a Cmaj7 as example:
.........H----.
.......G----...
....E----......
..C---.........
Writing will store a sequence only in the runtime memory. The sequence will be lost after a powering off or reset as it happens after uploading a new firmware.
To store the sequence permanently on the EEPROM you have to use the functions SAVE and LOAD in the setup menu. If you want to use this Arduino board for other applications please obey the remarks in the chapter about -> setup -> save/store.
Write Mode extended - tied notes and rests
Lets write now a four note phrase.Select an organ like sound at your synth. Take care, that there is no long “Release” on the sound.
- Press WRITE
- Play Key C
- Press F2 (=REST)
- Play Key C
- Press F1 (=TIE)
- Press STOP
- Press PLAY
Do the same with A.A-C.C-A.A-E-G- and sing “Fly, Robin, Fly”.
Write Mode extended - Correcting Steps
There is no real editing of a sequence for now (it may be possible in a later firmware version), but while writing you can step back by hitting the WRITE button for each step back. Example:We want to enter a Cmaj scale, but hit G# instead of G:
- WRITE
- C
- D
- E
- F
- G#
- A ... Aaargh, Hold it! The G# was wrong...
- WRITE (will step back and clear the A)
- WRITE (will step back and clear the G#)
- G
- A
- B
- C
- STOP
- PLAY
I think you 've got it.
Write Mode extended - Cancel Write!
Sometimes it happens (at least to me), that you press WRITE, though you did not want to write a new sequence. In this moment you have the chance to cancel the write-mode (and keep the existing sequence), by pressing WRITE again. But it is important, that no MIDI-NoteOn came in meanwhile and that you did not hit TIE, REST, PLAY, or STOP. As soon as one event happens, that the write-mode would record, the former sequence is gone.By the way: it is not possible to enter the write-mode while playing or while the setup. So the chance for this problem is quite low.
Play Mode
Playing a written sequence is simple: hit PLAY. The sequence will play in the tempo of the tempo potentiometer (or external clock - if selected) and with the blinking LED. (The LED blinks always - even when the sequence is stopped). Hit STOP to end the play mode.Play Mode - set Tempo
The SQ-3P provides an internal clock generator. The tempo-knob controls the speed of the clock.Play Mode extended - Thru and Transpose
While the sequence is playing, MIDI information from the keyboard may be forwarded to the output (so called Soft-Thru); depending on the setup-settings the synth will play the notes from the keyboard. The SQ-3P provides various thru-settings. For details see the setup section.The SQ-3P also provides the possibility to transpose the played sequence according to the incoming keyboard notes. There are three different types of TRANSPOSE. The center note for the transposition (where no transposition happens) can be choosen in the setup. For details see the setup section.
Play Mode extended - external Trigger-In
This is the topic, where the SQ-3P is different to all other standalone MIDI step sequencers, we know.You may replace the internal tempo clock or MIDI-clock, by an external trigger signal fed to the CLOCK-IN socket. To speak more exact: this is handled as a GATE signal. The input expects a voltage of +5 Volt (=gate on) or 0 Volt (=gate off).
If the input rises from 0V to +5V the MIDI noteOn messages for the notes in the actual step are sent.
If the input falls down from +5V to 0V the MIDI noteOff messages for the notes in the actual step are sent.
If the "NoteOff Mode" is set to "Gated" this means the length of the incoming "trigger gate" determines the length of the played note. (for other possible NoteOff Modes please see the setup section).
The gate signal may be higher than 5V, but gate off has to be 0 Volts
What is that good for?
Example 1:Have a drum machine like Roland TR-808 that sends continuous 5V-clocks.
- Connect the clock out of the drum machine with the CLOCK-IN of the SQ-3P.
- Press PLAY on the SQ-3P (the sequence will not play yet!)
- Start the drum machine
Example 2:
- Have a drum machine with progammable trigger out, like the Roland TR-606 or Roland TR-08 or many others.
- In the Setup reassure, that the “Note Off Mode” is set to “Held Note” (this is the default value from the factory - if you didn't change it until now, then go on)
- Write a sequence of four chords (each column represents a chord):
G G G G
E F E F
D C D D
C A C G - In the drum machine set a trigger at the first step of a bar, but none on the other steps in the bar
- Hit PLAY at the SQ-3P and start the drum machine
If you would try this with a regular internal 16th clock, you would need all 64 steps using the TIE function. Having the externally programmed trigger on step one, you have to enter only four steps.
Example 3:
- Have a drum machine with programmable trigger out, like the Roland TR-606 or Roland TR-08 or many others.
- Write a sequence of four single notes:
D E G A - In the drum machine set triggers at the following positions of a
4/4 pattern
x.x.xx.x.xx.x.x. (x means a trigger, dot means no trigger) - Hit PLAY at the SQ-3P and start the drum machine
Now change the sequence to "D" "E" "REST" "G" "A" "REST" => I think you will get it.
Mute sequenced MIDI while playing
If the sequencer is playing and you press PLAY again, then the MIDI-Out will be muted. No NoteOn messages will be sent from the sequence. MIDI NoteThru will still work. The "PLAY" in the top line of the display will change to "play", but you will see in the second display line, that the sequence continues running.As soon as you press PLAY again, the display will change to "plAY" and beginning with the next step 1 of the sequence the NoteOn messages will be sent again (and the display will change back to "PLAY"). Keep in mind: if your sequence/trigger-combination is like in the "example 3" described above, then the next step 1 of the sequence may not be the start of the next bar!
If you press PLAY again while the display shows "plAY" then the sequence will be unmuted immediately.
The muting will not affect the MIDI events provided by the MIDI-Thru functions!
Velocity Control
The velocity of the notes sent by the sequencer is always fix, because the sequencer does not record the velocity value of the incoming notes. The velocity value of the outgoing note messages is set by the rotary potentiometer CV1. If you feed a voltage to the input CV1, then the velocity will depend on the voltage fed here. The potentiometer will set the amount of this voltage.Note Length Control
The length of the played notes depends on the setting of the parameter NOTEOFF-MODE (please see section “Setup”).- If the NoteOff-Mode is set to "Held Mode", then a note will be held exactly until the next note or next pause.
- If the NoteOff-Mode is set to "Gated", then the length of a note depends on the length of the incoming signal at the clock-input. If you don't insert an external signal to the clock in the clock input, then the the note length will be half the length of a step.
- If the NoteOff-Mode is set to "CV-ctrl"”, you may control the length of a (not tied) note by the rotary potentiometer CV2. If you feed a voltage to the input CV2, then the note length will depend on the voltage fed here. The potentiometer will set its amount
Shut up mode :-)
Under certain cirumstances it may happen that the synth produces “hanging” notes - even if the sequencer is stopped. To cancel these notes in play mode or stop mode simply press F1/TIE. This will send NoteOff messages for all 128 Notes, NoteOn with velocity 0 for all 128 Notes, and the All Notes Off CC #123 on the selected MIDI-out channel.Pressing STOP in play mode sends also this kind of reset.
Shut up and reboot
Though software should be perfect, software never is perfect. So if this software hangs there exists a full system-reset:pressing all five buttons at the same time will restart the program. Unfortunately the Arduino itself may hang. In this case you have either to power cycle your system, or press the reset button on the Arduino pcb.
Setup Mode
In the setup mode you configure the general behaviour of the SQ-3P. You can enter the setup mode in play mode or in stop mode. In write mode the setup is not available.- To enter the setup menu press F1 and F2 together.
- The display will change and list the actual parameter in the upper line. The lower line will display the actual value of the parameter.
- To page through the parameters use F2 for "next" and F1 for "previous". The first setup starts after powerup starts with "transpose mode". For clock select, save sequence, or load sequence you may use the "previous"-function; for the note modes and channel settings you may use the "next"-function. You may step through all parameters in a circle in the both directions.
- To change the value of a parameter press WRITE.
=> An angled bracket (>) will appear at the start of the lower line to mark the EDIT mode. (in versions below 2.0 an exclamation mark was used instead of the angled bracket) - Change the value with F1 (=decrease by one) and F2 (=increase by one). To change in larger steps you can use a combination of F1 and F2 :
Version 2.0 and above: select the value using the CV2-potentiomer
Versions below 2.0: Press and hold F1 and a short press on F2 will decrease by ten. Press and hold F2 and a short press on F1 will increase by ten. - Press WRITE again to leave the EDIT mode.
=> the value will be stored in the non volatile memory and the ">" disappears. - To leave the setup menu press PLAY and STOP together.
Since the internal clock is software created and the setup mode eats up a lot of processing, the internal clock will assumingly become a little slower.
List of the available Parameters:
- "Transpose": switches between various transpose modes and off.
- "Noteoff Mode": switches between a gated note length and notelength until the next step.
- "Note Length": sets a minimum note length for the gated NoteOff mode.
- "Out-Channel": sets the MIDI channel on which the SQ-3P sends its sequence.
- "In-Channel": sets the MIDI channel on which the SQ-3P expects incoming note data.
- "Note-Thru": determines under which conditions incoming notes from the keyboard are forwarded to the synth.
- "Control-Thru": sets whether incoming MIDI-ControlChange data are forwarded to the synth.
- "Program-Thru": sets whether incoming MIDI-ProgramChange data are forwarded to the synth.
- "Bend-Thru": sets whether incoming MIDI-Pitchbend data are forwarded to the synth.
- "OtherCh-Thru": sets whether MIDI-data on other channels than the out channel are forwarded to the MIDI out.
- "Osmose Mode": enables an ftertouchs command for each played note. This feature can be used for sequencing Expressive E Osmose
- "Adjust Poti-CVs": adopts the software for the real potentiometer values
- "Factory Reset": restores to the default parameter values and loads the test sequence
- "SaveSequence": saves the actual sequence in the EEPROM
- "LoadSequence": loads the sequence from the EEPROM
- "Clock Source": selects the clock source from which the tempo is derived
- "Start/Stop Source": selects the source from which start commands and stop commands are derived
- "Send Clock": determines whether MIDI clock or VMC clock are sent, when playing with internal Tempo
- "Clock Divider": determines the division factor for the sequence steps related to the received or sent MIDI- or DIN-clock.
- "Transp.Center": sets the note value, that corresponds to 'no transposing'
Now the detailled desciption of the parameters
Transpose Mode
Transpose shifts the played sequence. Incoming noteOns on the selected MIDI-channel will shift the played sequence corresponding.C5 (MIDI NoteNumber 60) corresponds to no transpose. MIDI NoteNumber 62 = D5 will shift the sequence a full note up, MIDI NoteNumber 53 = F4 will shift a quint down.
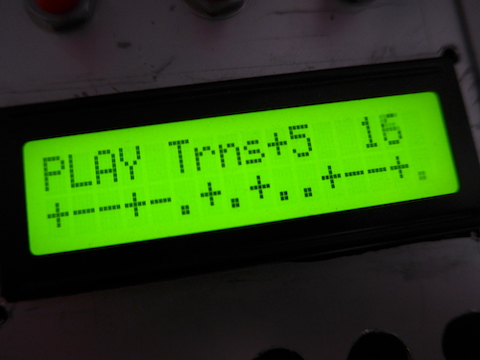
If a transpose shift is effective its amount will be displayed in play mode and stop mode.
Transpose does NOT affect the notes played manually via MIDI thru, and never affects the notes written in the memory - it is only a playback function. Transpose is not active for the Thru-Notes in write mode.
| Value | Comment |
| off | No transpose. |
| Continous | All incoming MIDI NoteOn events are used for the transposition. MIDI Thru is deactivated in this transpose mode. |
| Momentary | The sequence is transposed only as long as the transposing key on the keyboard is pressed. MIDI Thru is deactivated in this transpose mode. |
| ButtonEnabled (Factory Default) | While play mode press the F2 button and play a key on your keyboard to set the transposition. As soon as you release the F2 button this transpose value is kept and incoming MIDI Note events are used for MIDI Thru. Only the sequence will be transposed. The MIDI Thru events will not be changed. This mode corresponds to the transpose mode of the Roland JX-3P or Juno-Series - with exception of the MIDI-Thru behaviour. |
Noteoff Mode
The noteOff mode selects, what determines the outgoing noteOff. In play-mode this setup page can be reached directly by pressing the WRITE button.| Value | Comment |
| Held Note (Factory Default) | The noteOff is sent immediately before the next step. This mode is the same as in the Roland JX-3P or SH-101. This mode is required for the chord progression trick described in "Example 2" in the section "What is it good for". Please keep in mind that stopping an external source of gates sent to the clock input in this mode without stopping the SQ-3P sequence will cause the last note to "hang". Press STOP on the SQ-3P then. |
| Gated | The noteOff is sent when the incoming clock signal goes from +5V to 0V. With the internal clock this is at 50% off the step time. |
| CV-ctrl | The time until the noteOff is sent is determined by the value provided by CV2 If a voltage is provided to input CV2, this voltage will control the notelength. In this case the potentiometer CV2 controls the amount of this voltage. If you need very short notes, then choose "CV-ctrl", set "note length" to zero and turn CV2 fully counterclockwise. |
Note Length
Some clock sources e.g. drum machines send extremely short trigger pulses. This may cause trouble with some sounds. To avoid this a minimum note length can be defined. The values are not given in a dedicate time measure, like milliseconds. Simply some numbers.| Value | Comment |
| 1 - 127 (Factory Default 30) | Versions below 2.0: Between 1ms and 20ms changed in 1ms steps. Between 20ms and 240ms changed in 10ms steps. Versions above 2.0: Single steps by F1 or F2. To do larger changes press F1 and F2 together and use CV2 to select the value (nothing plugged into CV2 !) |
Out Channel
The MIDI-channel on which the sequence and thru'ed Program/Control/Bend-data are sent out.| Value | Comment |
| 1 - 16 (Factory Default = 1) |
Pay attention if you are in playmode: Changing the channel while the sequence is playing or thru'ed notes are active will cause note hangs. In some special cases this may be wanted behaviour, so we did not prevent this. To end these hangs while play mode switch back to the former channel, leave the setup mode and press TIE (the sequence will play on) or STOP (the sequence will stop). |
In Channel
The MIDI-channel on which the SQ-3P expects the data, that shall be written into the sequence.| Value | Comment |
| 0 = Out-Channel (Factory Default) or 1 - 16 |
Incoming MIDI data on the in-channel will be sent out on the out-channel. This is valid also for control, programchange, and pitchbend data! It is recommended to deactivate OtherChannelThru if in-channel and out-channel are different. The main intention for this feature is that you may have a single keyboard, but several SQ-3Ps (or similar devices) in the thru chain. In that case you don't have to change the send channel on your keyboard, but simply use the out-channel on the SQ-3P. Otherwise we recommend to set the In-Channel the same as the Out-Channel. |
Note Thru
This parameter determines under which condition note messages from the keyboard (= on the in-channel) are forwarded to the synth (= on the out-channel).| Value | Comment |
| Off | Incoming note data are not forwarded. |
| Rec | Incoming data will be forwarded while writing the sequence, but not while play or stop. |
| Play | Incoming data will be forwarded while playing the sequence or stop, but not while writing the sequence. This mode may be useful for using the SQ-3P live on stage. You may enter the sequence unheard, without the need to mute the synth. |
| Rec+Play
(Factory Default) |
Incoming data will be forwarded
all the time. |
| Play-Triggered |
This is a planned experimental mode, coming with version 2.2x: Incoming notes will be forwarded normally while recording and while stop-mode. In play-mode the incoming notes will be played in the same rhythm as the sequence. In detail the play-mode works like this: The original NoteOn is forwarded. If a NoteOff is sent for the sequence, also a NoteOff is sent for the incoming held notes. If the incoming note is still active (no NoteOff has been received) then a NoteOn for the sequence will redo a NoteOn for the incoming note. If a NoteOff is coming in, it will not(!) be sent to the output immediately. It will be sent with the next NoteOff from the sequence. |
Control-Thru
Determines whether MIDI controlchange data from the keyboard (= in-channel) are forwarded to the synth (=out-channel)| Value | Comment |
| On (Factory Default) | see general comment regarding
the thru modes below |
| Off |
Program-Thru
Determines whether MIDI Programchange data from the keyboard (= in-channel) are forwarded to the synth (=out-channel)| Value | Comment |
| On |
see general comment regarding
the thru modes below |
| Off (Factory Default) |
Bend-Thru
Determines whether MIDI controlchange data from the keyboard (= in-channel) are forwarded to the synth (=out-channel)| Value | Comment |
| On (Factory Default) | see general comment regarding
the thru modes below |
| Off |
!!! Important Remark on Thru-Modes !!!
If you use the same device as keyboard and as synth then all those Thru-settings depend on your instrument.If the instrument has a local-off mode, then you should activate this local-off mode and you should set all Thru-settings to “On” and the NoteThru not to “On”. For example my Rhodes Chroma Polaris in local off mode needs ControlThru and BendThru set to “On”. Otherwise the Chroma Polaris could not be edited. But ProgramThru has to be set to “Off”. Otherwise a MIDI-Loop on program change commands would happen and bring the whole MIDI-system to hang.
If the instrument has not(!) a local-off mode then you MUST set all Thru-settings to “Off”. Otherwise you would create an endless MIDI-loop which typically makes all processors overload and leave the system in unusable state, which typically can be solved only by switch off both the synth and the SQ-3P. The same is valid if you use the SQ-3P at the input and output of a MIDI-sequencer like Logic, Cubase, Ableton, Reaper, what ever…
OtherCh-Thru
Determines whether incoming MIDI data (no matter which type) in channels other than the out-channel are forwarded to the output.| Value | Comment |
| On |
A high MIDI traffic on other
channels will affect the performance of
the SQ-3P since every data byte has to be handled by the processor. It
even may cause the sequence to stutter or to stop. (Imagine an
orchestras
conductor who also has to hand out dishes from the kitchen while the
concert all the time...) You should be aware, that in this mode also an incoming MIDI clock is forwarded to the output. If your SQ-3P is sending MIDI-Clock itself, this will lead to double time clocking or stumbling clock slaves. |
| Off (Factory Default) |
Osmose Mode
This enables a mode to play notes on the Expressive E Osmose (new in Version 2.0 and above)| Value | Comment |
|
ON OFF (default) |
Switching this parameter on makes the sq-3p send an aftertouch command with the value used for velocity too. |
Adjust Poti-CVs
Potentiometers are produced with a tolerance of 10% or even 20%. This function adopts the software to the individual potentiometers in this circuitry. Below version 2.0: This procedure has to be done after a factory reset.| Value | Comment |
| no value - display reads: Press Write |
After pressing WRITE a screen will be displayed like SET POTIS TO MAX >THEN PRESS F1 (versions 1.x: !THEN PRESS WRITE) Turn the three potentiometers fully clockwise. Then press WRITE. The adjustment procedure will run automatically and will display the potentiometer it is working on. Depending on the offset you will see the adjustment parameters counting up or down. Finally the display will read "Tempo is good!" and switch on to the next knob. The display will switch to "CV1" and after some counting the display reads "CV-1 is good!". The display will switch to "CV2" finally, and after some couting the process will end with "CV2 is good!". If you did not set the potentiometers to the maximum before pressing WRITE the second time, then wrong offsetvalues will be stored. This won't harm the module electrically, but unwanted effects might happen on the MIDI-out. If this happens, simply repeat the procedure with the potentiometers set to maximum really. The offset-values will be stored in the non-volatile EEPROM. So usually this procedure has to be called only once. |
Factory Reset
Writes the factory default settings in the non-volatile EEPROM and loads them then into the runtime memory.| Value | Comment |
| no value - display reads: >Press Write |
Press the WRITE button. The display shows "Cancel press STOP, Reset press F1" The display will change to "Reset EEProm", and then you will see the "Load Sequence" display (see below). After the first WRITE you can cancel the Reset by pressing STOP. This should not be done in PLAY mode. Hanging notes and other unwanted issues might occur. Version 1.x only: Since the factory reset overwrites the settings of the potentiometer adjustment you have to redo the potentiometer adjustment. |
Load Sequence
Loads the sequence stored in the non-volatile EEPROM into the runtime memory.| Value | Comment |
| no value - display reads: Press Write |
Press the WRITE button. You may cancel now by pressing STOP or continue by pressing F1.
You will see a short flicker, when the function counts the notes and steps. Then the lower line reads "Load Done". Load should not be done in PLAY mode. Hanging notes and other unwanted issues might occur. |
Save Sequence
Saves the sequence from the runtime memory in non-volatile EEPROM.| Value | Comment |
| no value - display reads: Press Write |
Press the WRITE button. You will be asked to continue by pressing F1 or to cancel by presing STOP. You will see a short flicker, when the function counts the notes and steps. Then the lower line reads "Save Done". Save may be done in PLAY mode, but the sequence may stumble if the save action takes longer than one step of the sequencer |
Clock Source
Determines, where from the tempo of the SQ-3P is controlled. You should not forget to set the "Start/Stop Source" too (next menu). This setting is not stored in the internal memory. After switching off and on, always the internal clock is used. (changed in Version 2.0 and above)| Value | Comment |
| Internal (factory default) | The SQ-3P is controlled by the internal clock generator. |
| MIDI Clock |
The SQ-3P is controlled by an incoming MIDI-clock. This does NOT(!) enable the Start/Stop control via MIDI automatically. You have to enable this in the next menu |
| VMC Clock | The SQ-3P is controlled by an incoming VMC-clock. VMC-Clock is available with hardware version 1.5.5 or later. Earlier versions require to solder some additional wires on the pcb (instructions coming soon). This does NOT(!) enable the Start/Stop control via VMC automatically. You have to enable this in the next menu |
Start/Stop Source
The SQ-3P can always be started or stopped by the buttons on the module or by the corresponding trigger inputs. Addionally you can enable start/stop control by MIDI and/or VMC-bus / DIN-Sync (only in Version 2.0 and above)| Value | Comment |
| Internal only (factory default) | |
| MIDI Start/Stop | These settings are only for start and stop. The pause/continue function still is only controlled by the START button. |
| VMC Start/Stop |
Send Clock
When running with the internal clock generator, then the SQ-3P optionally can send MIDI-Clock and/or VMC-clock/DIN-Sync. This will not(!) work with syncing from MIDI-Clock or VMC-clock. (only in Version 2.0 and above)| Value | Comment |
| none (factory default) | no clock signals will be sent |
| MIDI | MIDI-clock and MIDI-start and MIDI-stop are sent |
| MIDI+VMC | MIDI-clock and MIDI-start and MIDI-stop are sent; 24ppq clock and a running gate is sent to the VMC-bus / DIN-sync |
| VMC | 24ppq clock and a running gate is sent to the VMC-bus / DIN-sync |
Clock Divider
This parameter determings the division factor for the sequence steps related to the received or sent MIDI- or DIN-clock. (changed in Version 2.0 and above)| Value | Comment | |
| 1/16 (Factory default) | The internal sequencer gets 16 triggers per 4/4-bar. | Attention! Though it is pollible to change these settings while the sequencer is running, we cannot guaratee that the sequencer will be in sync with the external devices, after a division change. We recommend to change this setting only when sequencer is not running. |
| 1/8 | The internal sequencer gets 8 triggers per 4/4-bar | |
| 1/4 | The internal sequencer gets 4 triggers per 4/4-bar | |
| 1/1 | The internal sequencer is triggered each 4/4 bar | |
| 2/1 | The internal sequencer is triggered every second 4/4 bar | |
| 1/12 | The internal sequencer gets 12 triggers per 4/4-bar | |
| 1/24 | The internal sequencer gets 24 triggers per 4/4-bar | |
Transp. Center
Sets the note value, that corresponds to 'no transposition'. All keys below this note will transpose down, all keys above this note will transpose up.| Value | Comment |
| 0-127 (Factory default 60) |
Press the WRITE button. Now you have three possibilities to set the centernote
|
All product names and brand names beside “VMC-1”, “SQ-3P” and “fanwander” belong to the corresponding owners. They are mentioned only for educational purposes.
All rights reserved, by Florian Anwander 2020 - 2024
© Florian Anwander, 2020-2022 [ imprint/impressum ] [ contact ]