Programming Instructions VMC-1
Overview
Basically the VMC-1 is nothing special. It can be handled like any other Arduino Nano hardware. You may learn everything at https://arduino.cc. Nevertheless I will try to describe the required steps to get a running software on the VMC-1.Prerequisites
- A computer with USB running either Windows or Linux or Mac OS. The computer must suit the requirements of the software "Arduino IDE"
- The software Arduino IDE installed on this computer. You may download it from https://www.arduino.cc/en/software
- A USB-Cable USB-2.0-A connector <-> USB-2.0-Mini-B connector.
- Driver for the CH340 USB-Chip installed on your system
- Arduino MIDI-Library MIDI.h
Installing the CH340-driver
The Arduino Nano may come in one of two possible hardware variations in regards of the USB-Interface-Chip. The original Arduino Nano uses a chip called FT232, most of the clones use a chip called CH340G. The Arduino IDE supports out of the box only the FT232. You may identify them by the count of the pins: the CH340G has 16 Pins, FT232 has 32 pins: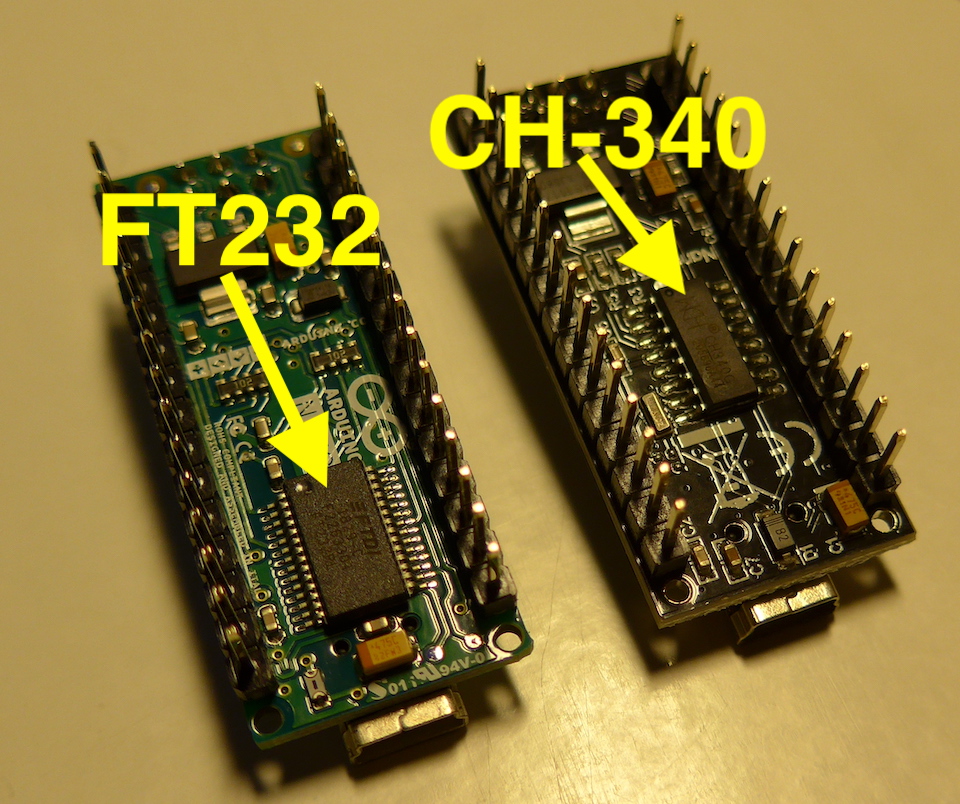
If you use a clone, then you have to install the CH340 Driver on your system.
You may find an instruction here: https://www.makershop.de/ch340-341-usb-installieren/
I provide the drivers for download:
Installing the MIDI-Library
Usually the Arduino IDE comes without a MIDI library. To install it do the following:- Start the Arduino IDE
- A default sketch-file will open. You may ignore this.
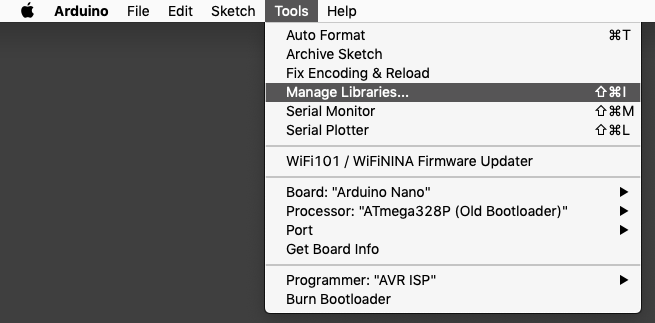
- Click ->Tools ->Manage Libraries
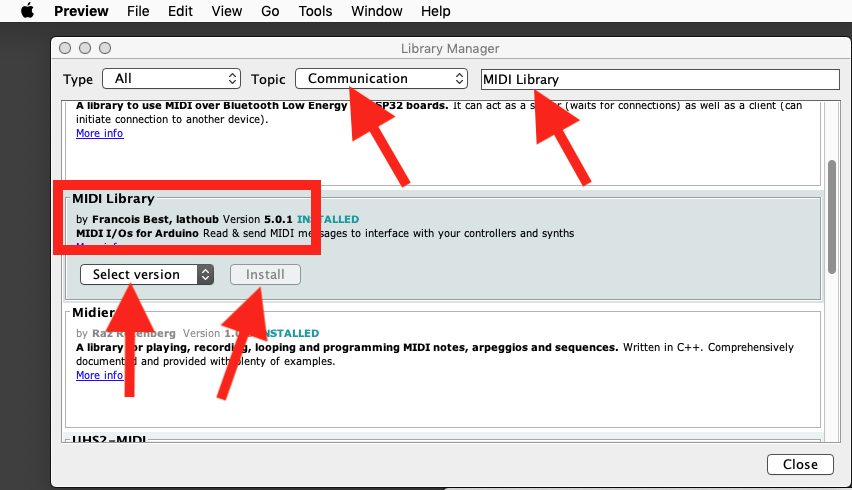
- A window will open with a long list of libraries.
- In this window set the pulldown field "Topic" to "Communication" and enter in the search field "MIDI Library".
- This will reduce the list of libraries to about four entries.
- At "MIDI Library" select the latest Version (in the screenshot it is 5.0.1) and click Install
Now the Arduino IDE is ready for most of the projects.
Connect the Arduino Nano to the IDE
- Connect the Arduino Nano via the USB-Cable to your computer. If the Arduino Nano is mounted on the VMC-1 module, you have to switch the two DIP switches off (they should face horizontally now). This will disconnect the MIDI-Ports. Otherwise the MIDI ports would block the communication with
the USB-Port.
- Start the Arduino IDE software
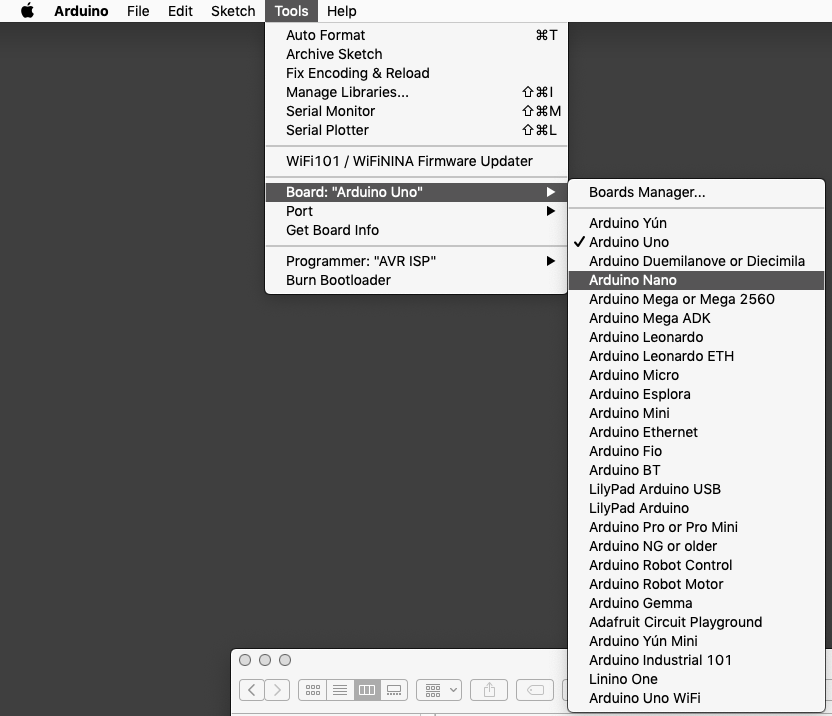
- Select ->Tools ->Board ->Arduino Nano
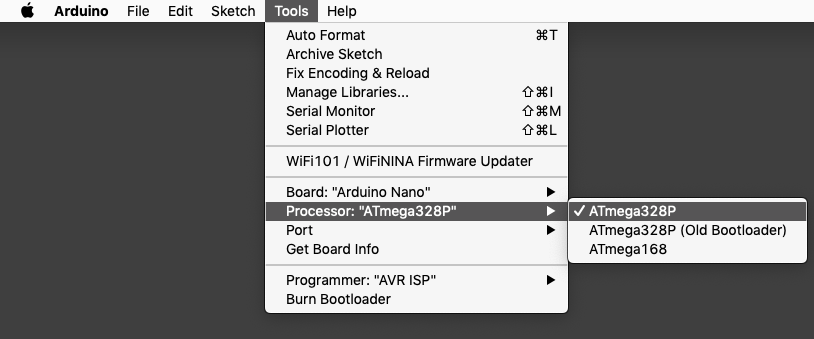
- Now depending on the CH340 or FT232 chip of your Arduino Nano
- If FT232-Chip: Select ->Tools ->Processor ->ATmega328P
- If CH340-Chip: Select ->Tools ->Processor ->ATmega328P (Old Bootloader)
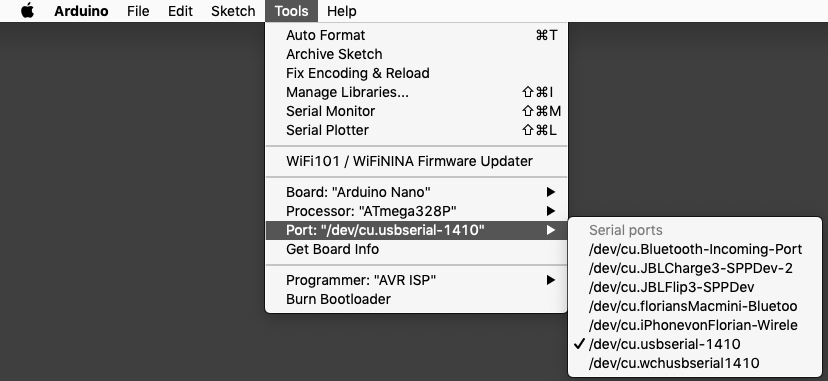
- Select ->Tools ->Port ->your-desired-port
It may be tricky to find the right port. As you see in the screenshot below a lot of ports are found. Usually the IDE shows only USB-ports on which an Arduino is connected to. Select this port.
- Select ->Tools ->Get Board Info
This should report something like this:
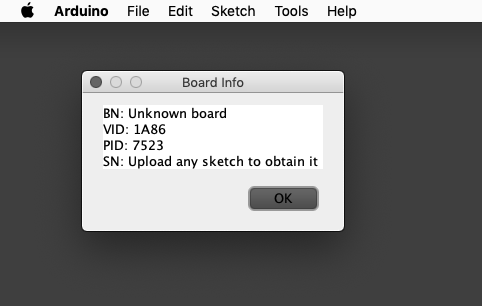
If you get this window then your Arduino IDE and the Arduino Nano are ready for writing the software.
One last thing:
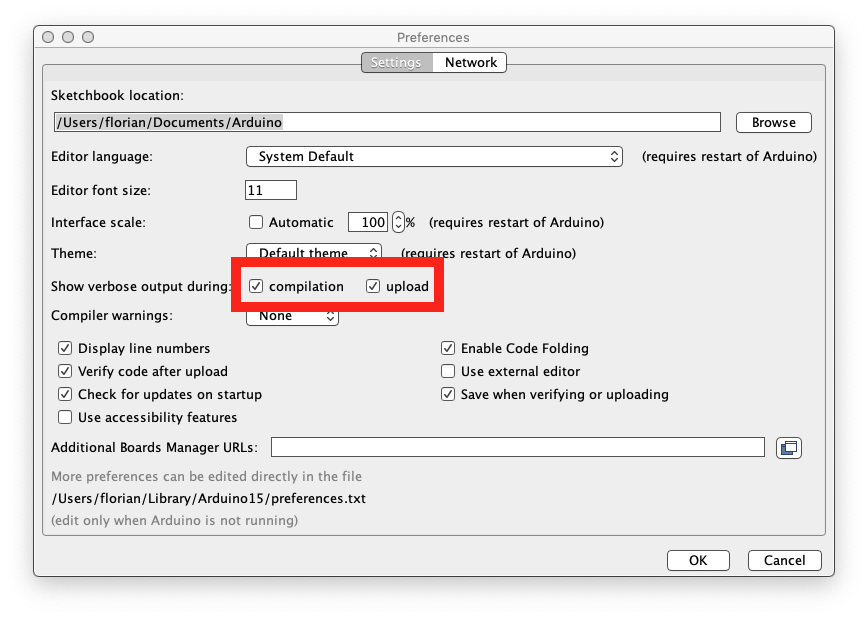
- Select ->Preferences ->Network and enable "Show verbose output during" for both choices: "compilation" and "upload"
Download the software for the VMC
I publish software on my homepage http://www.florian-anwander.de/. Also
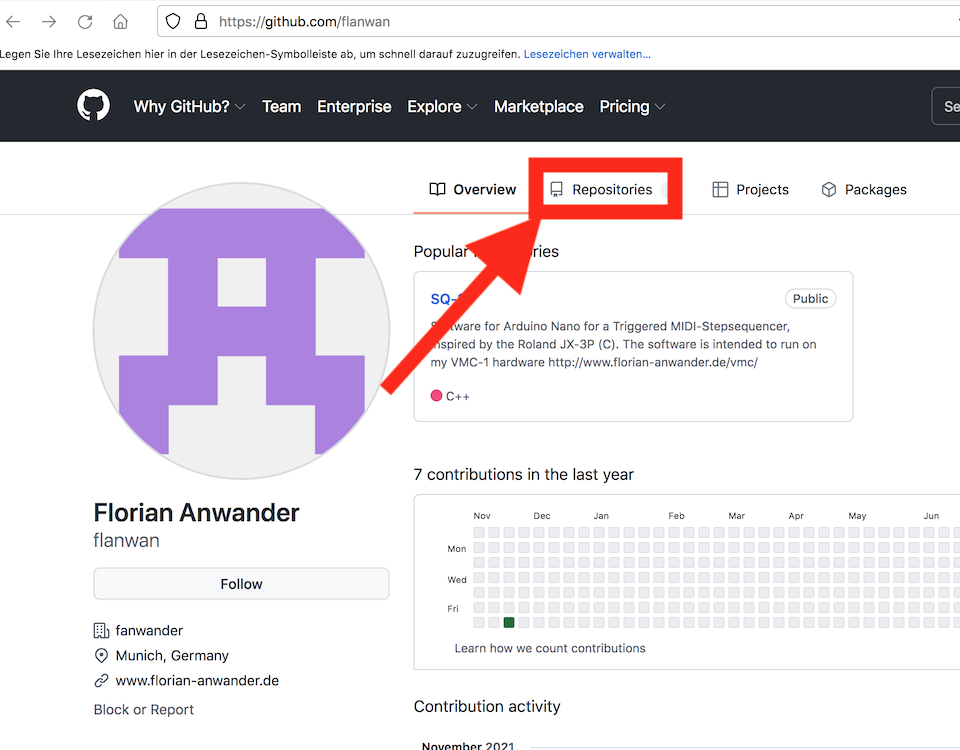
the software is available at https://github.com/flanwan/.At http://www.florian-anwander.de the arduino software is available directly as *.ino-file.
At https://github.com/flanwan/ click on "repositories" in the menu bar:
This will show a window with one or more repositories (while I am writing this instruction there is only one repository: the SQ-3P):
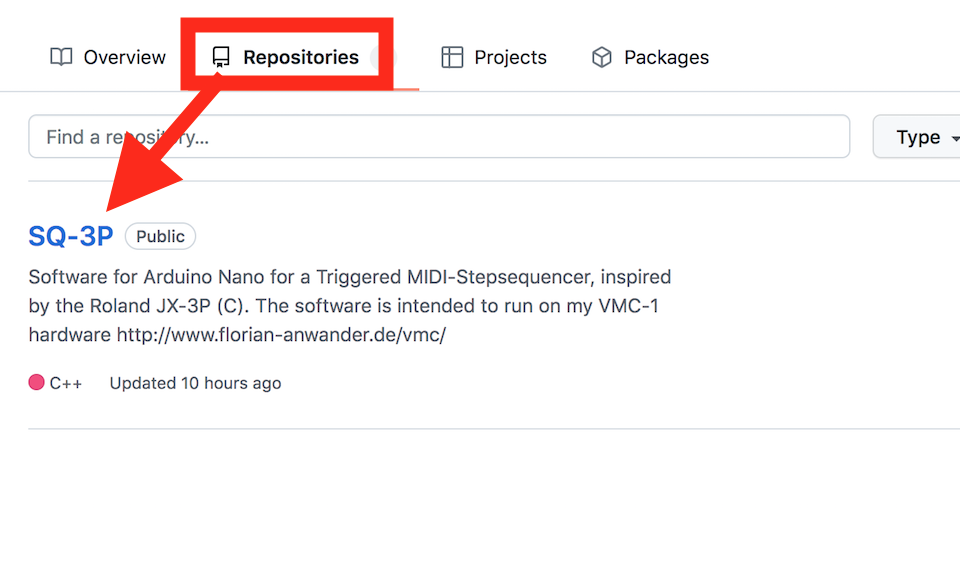
Click on the name of the repository (here: "SQ-3P"). A page with a list of all files contained in the repository will be shown. On this page click on the green icon "Code":

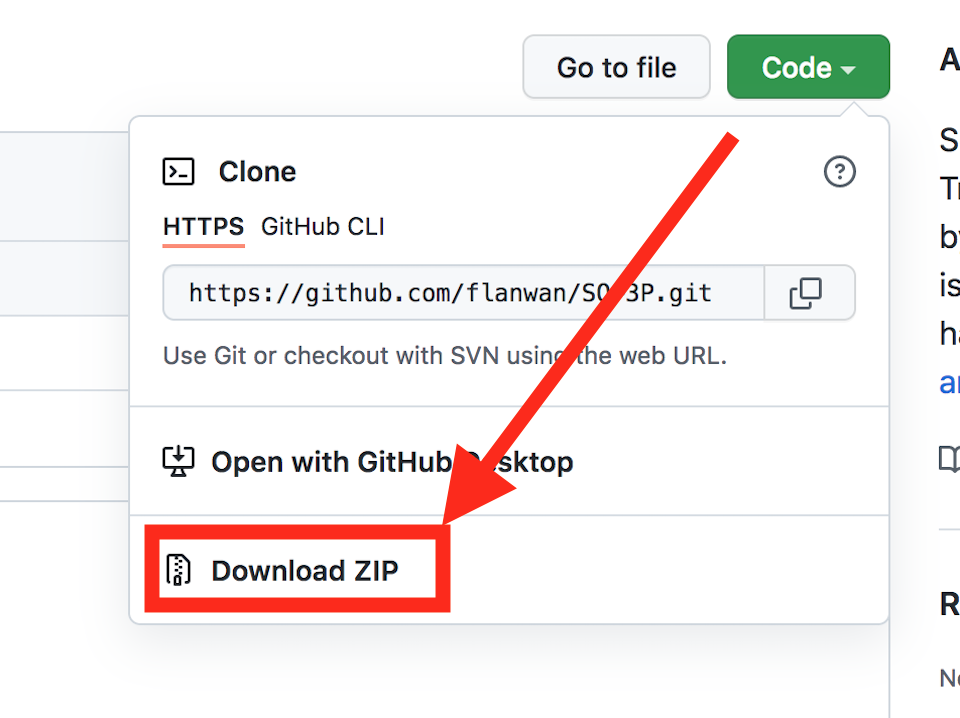
A selector window will open. Click on the last entry "Download ZIP":
This will start the download of a file called something like "somesoftware-main.zip". In this case: "SQ-3P-main.zip". Depending on the settings of your browser the file can be found at the "downloads"-folder of your system, or the browser will ask you where to store the file.
Usually the Arduine IDE will have created a project folder. On MacOS it is $HOME/Documents/Arduino/.
- Save the zip-file in this folder.
- Unpack the File. It will create a folder "SQ-3P-main" and place the files inside this folder.
Upload the file from IDE to Arduino Nano
- Start the software "Arduino IDE" on your computer.
- Click ->File ->Open and then navigate to the directory mentioned above and select the *ino-file.
- A window with the source code will open.
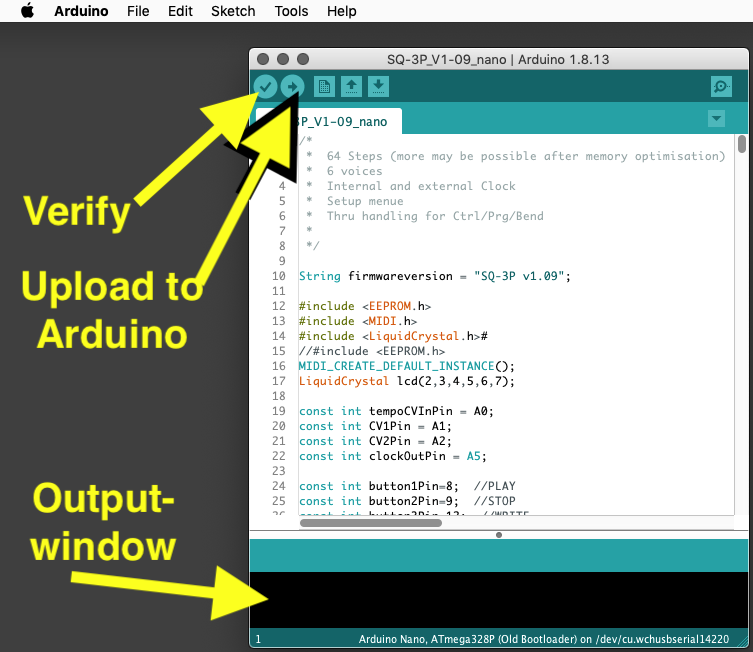
- Click the verify-icon.
"Global variables use 1390 bytes (67%) of dynamic memory, leaving 658 bytes for local variables. Maximum is 2048 bytes."
(If there are any red messages and/or a warning appears in the output window, then copy&paste the output and ask with this code at an Arduino support forum.)
- Now click the upload-icon

This output must end like "avrdude done. Thank you".
Your Arduino Nano is now programmed for the use in the VMC.
If you programmed it seated in the VMC don't forget to switch the DIP-switches back (otherwise MIDI won't work)
Ugly possible pitfall: old data in the EEPROM
If you run various software on the Arduino, then you have to keep in mind, that loading new software does not overwrite the data in the user part of the non-volatile EEPROM. This means if your former program held light control data in the EEPROM and the next program reads notes for a sequencer, then the sequence most likely will not work. You have to reset the EEPROM before! All my programs provide a function "Factory Reset", which does that.If you are writing your own software or use foreign software, then a simple code for doing this in the VMC-1 is:
#include <EEPROM.h>
#include <LiquidCrystal.h>

LiquidCrystal lcd(2,3,4,5,6,7);

void setup() {
   lcd.begin(16, 2);
   lcd.setCursor(0, 0);
   lcd.print(F("Reset EEprom"));
   int i=0;
   for (i=0;i<1023;i++) {
       EEPROM.write(i,255);
       lcd.setCursor(0, 1);
       lcd.print(i);
   }
}

void loop() {
   lcd.setCursor(0, 1);
   lcd.print(F("Reset Done      "));
}
|
©Florian Anwander, 2021 [ imprint/impressum ] [ contact ]